
Hail damage assessment guide
Whether you are new to inspections for storm damage or you have been doing them for years; we all have an idea of what we are looking for when it comes to hail damage. Some of us may be a little confused about it. Unfortunately, some of us may live or work in an area that does not have enough damage for us to form an idea of what it actually looks like. Which ever end of the spectrum that you may land on, it is important that we set those opinions to the side as you read through this assessment so that we can all arrive on a more common ground.
The definition of hail damage is already established in the insurance industry. It is described as something along these lines ‘Damage that diminishes the water shedding capabilities or negatively effects the lifespan of the shingle.’
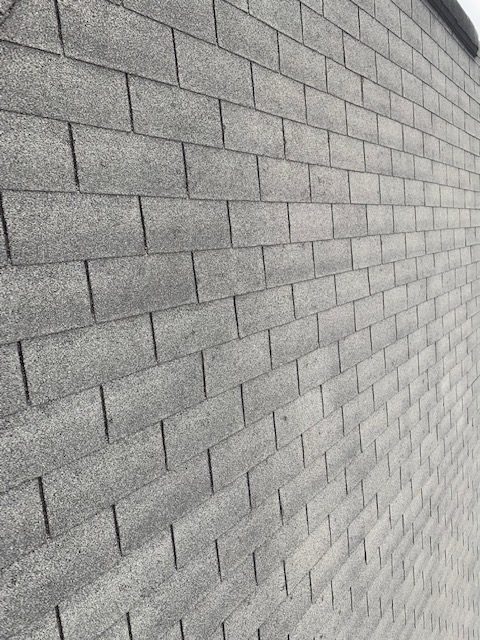
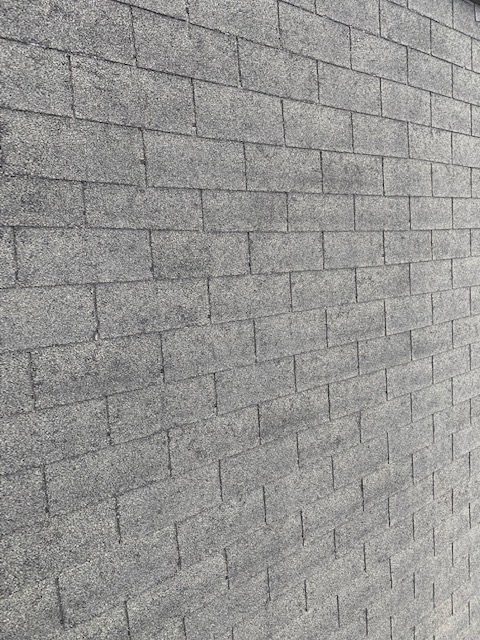
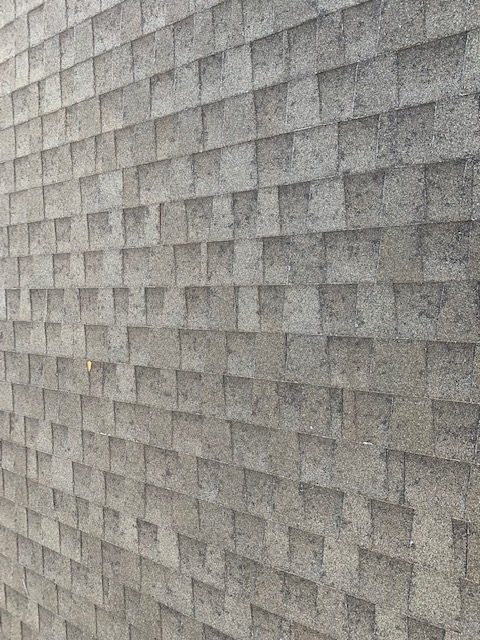
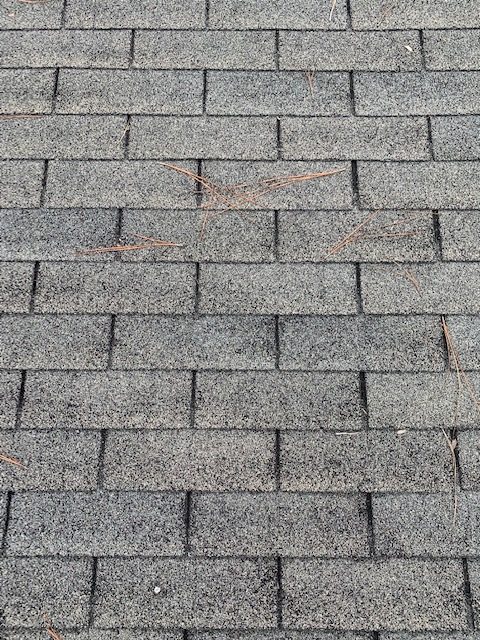
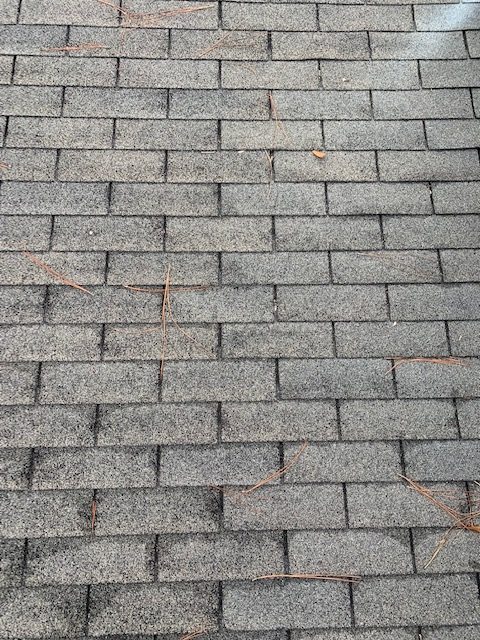
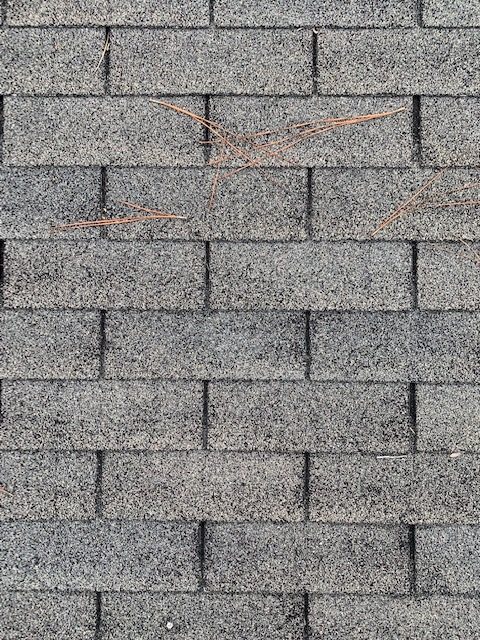
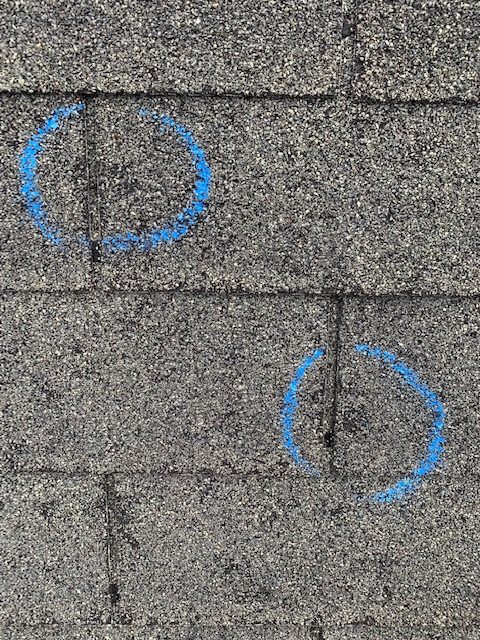
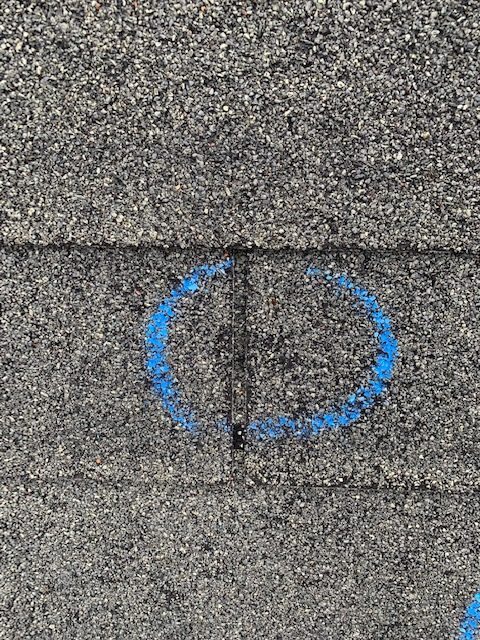
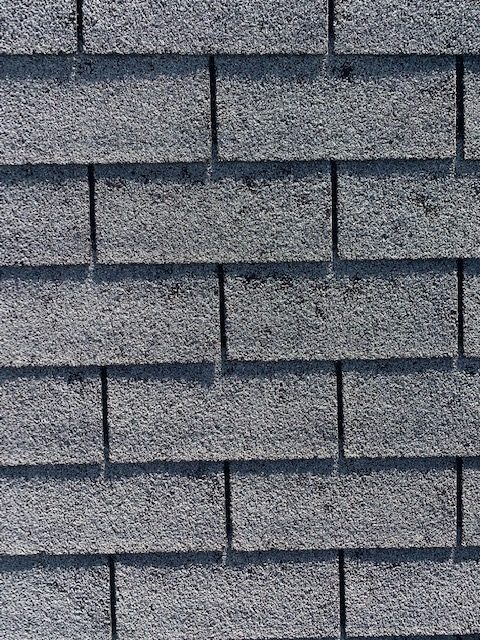
It is important that we focus on this statement or definition as two separate qualifications and not as if one precedes the other. For example, there are cases during an inspection that you may be presented with granule loss across an entire slope that was caused by a recent hail storm. Upon further inspection you realize that there is not much bruising and no punctured mats present. It is also understood that shingles are manufactured with the expectation that they will loose granules over the lifespan of the product. Therefor granule loss caused by hail does not necessarily qualify as hail damage. Unless the granule loss is widespread across the effected slope. This is where inspectors loose sight of the second qualification in the established definition of hail damage. Too often we get caught up in feeling the shingle for bruises or fractured mats. If you are seeing widespread granule loss, the lifespan of the shingle is negatively effected.
-Examples of widespread granule loss
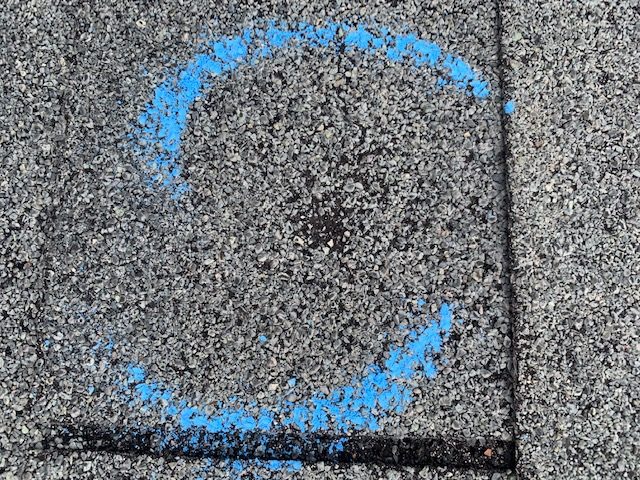
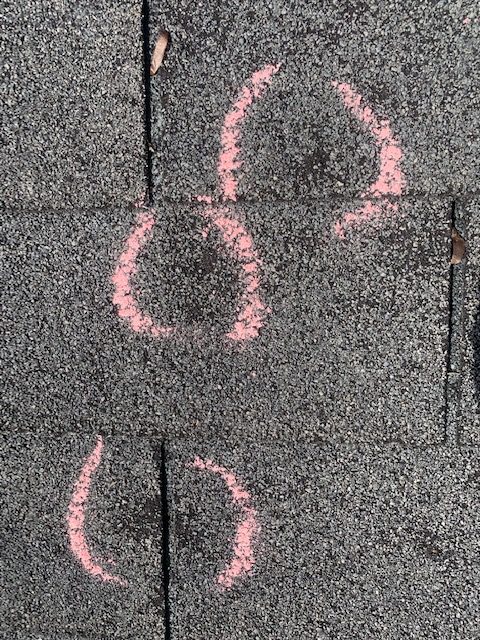
What does hail damage look like?
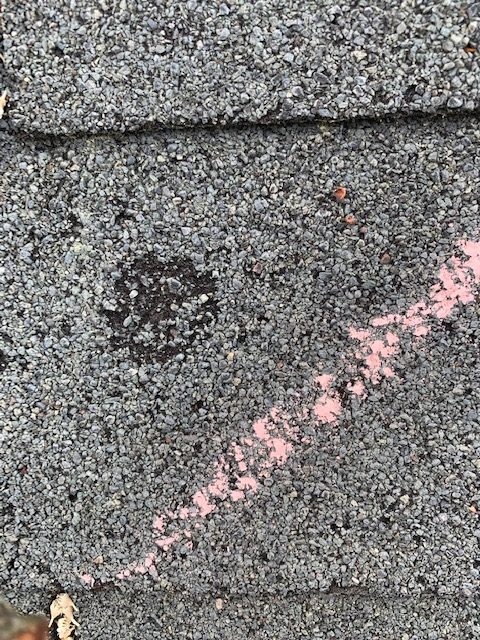
Typically when hail impacts a shingle, it drives granules in to the shingle. Some granules around the impact area bounce off of the shingle mat at the time of impact, exposing the mat of the shingle.
As previously mentioned some of us may be a bit confused about what hail damage looks like and/or may not live in an area with enough damage present to form an understanding of what hail damage looks like. Hands down, the absolute best way to form an understanding of what hail damage looks like is to see it over and over again.
Fortunately, you don’t have to leave your screen or even go to a three day seminar to learn what damage looks like. We have plenty of pictures and examples to give you a good idea of what damage looks like, even if you haven’t seen it before. So, let’s walk through a few scenarios that you may encounter on an inspection.
Before we get to the roof, we must do a walk-around or collateral inspection
How do we perform a collateral inspection and what are we looking for?
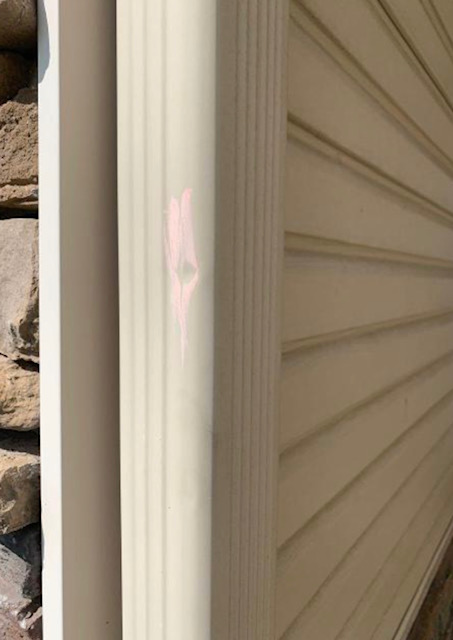
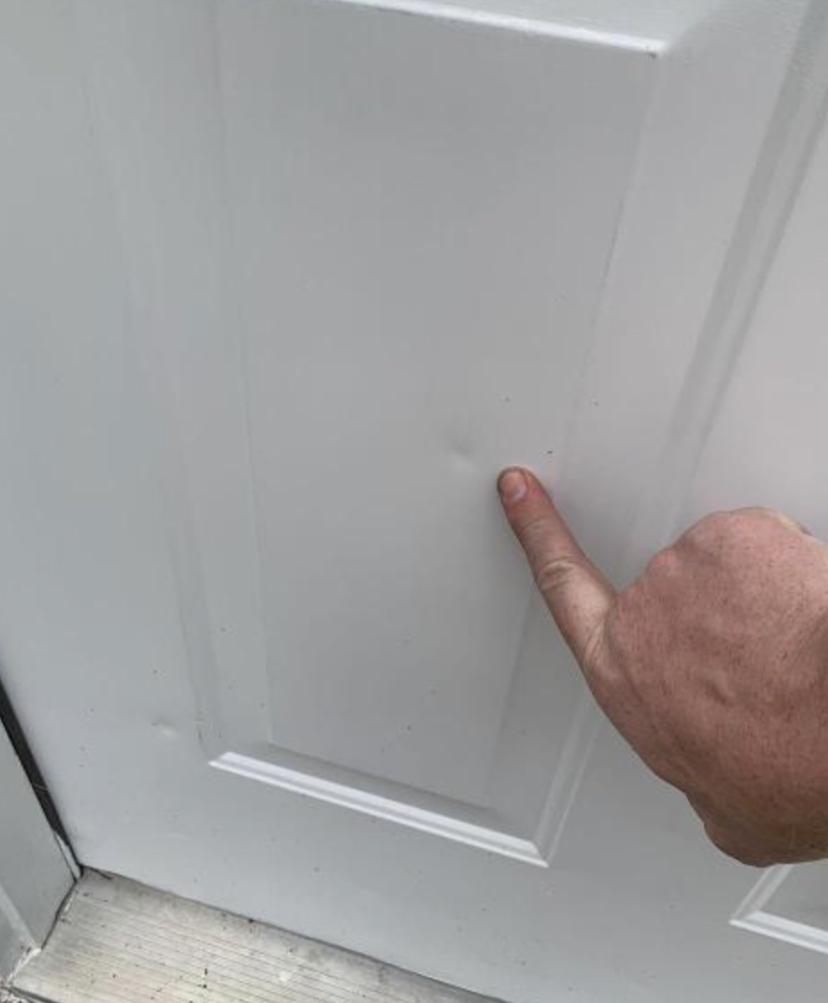
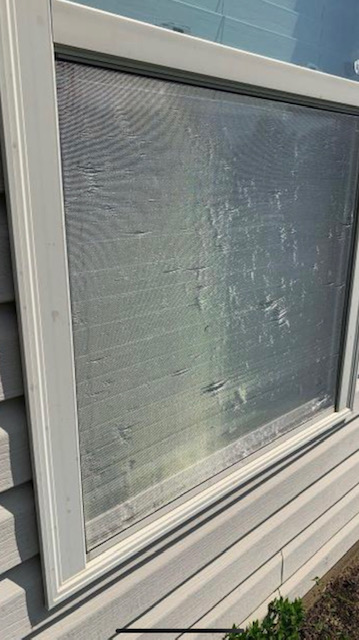
When on an inspection, we are looking at all possible damage caused by the storm. If we are able to find collateral on our walk-around, it helps us ‘paint the picture’ so to speak. Collateral damage gives us an idea of the size of hail that we may be dealing with, the potential direction that the storm may have come from, and possibly the severity or volume of the hail.
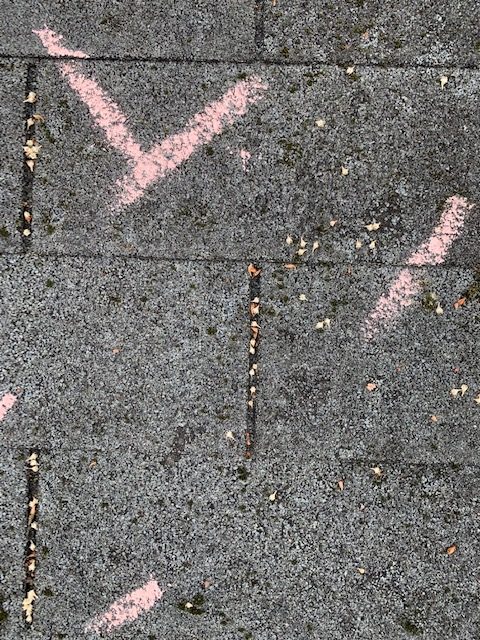
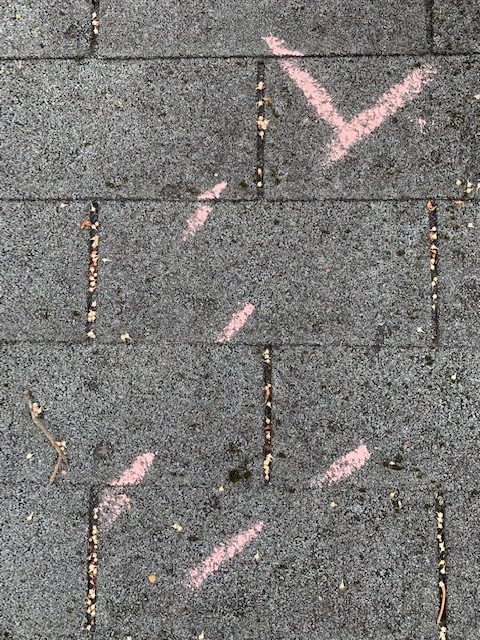
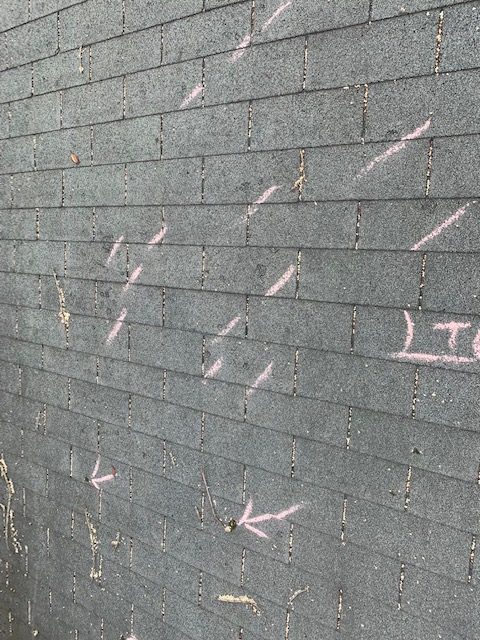
As soon as you step out of your vehicle, you should try to be very observant. Starting by looking at the mailbox for any signs of spatter or dents.You may also notice spatter on the sidewalk and/or the driveway if the storm is somewhat recent. After greeting the property owner, we start our walk around.
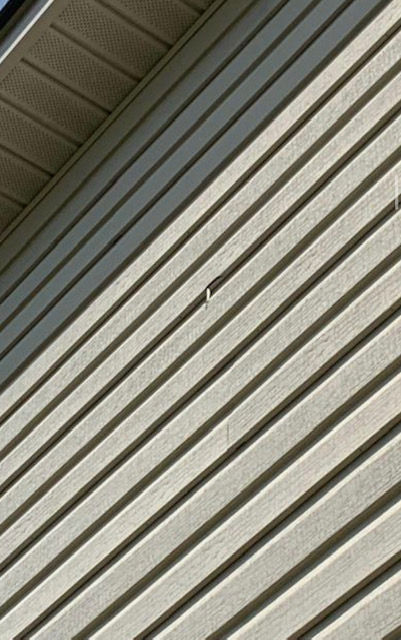
One rule of thumb when looking for collateral is that we want to look around eye level. If we are seeing widespread collateral and the collateral below eye level is consistent with the rest of the collateral, it is safe to document this collateral as well. By doing this, we avoid any damage that may have been caused by debris from a lawn mower or weed eater.
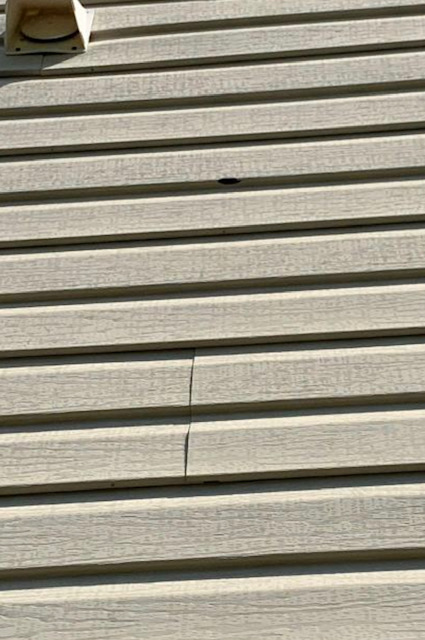
To keep with the common theme that you may notice here, we look at everything as a whole. If you see one baseball sized hole in the siding but nowhere else, this may not be hail. Likewise if you see a lot of damage on one elevation but no other collateral; it may serve you to think about other possible occurrences, such as a child throwing something against the house, or maybe they have a gravel driveway on this side of the home and the lawnmower caused some damage.
What are we looking at on our walk-around? Here’s a checklist to help you through if you need it.
-
Mail Box -
Garage Doors -
Exterior Doors -
Windows -
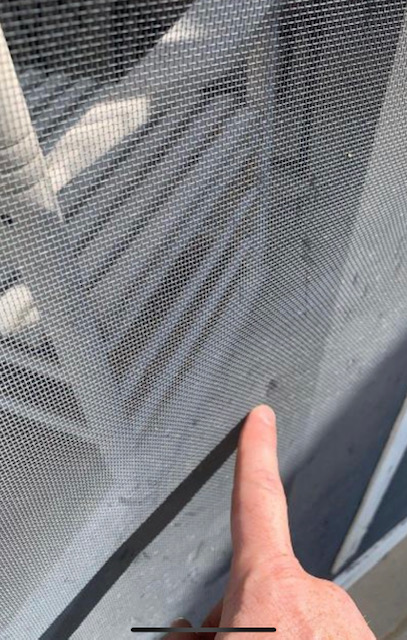
Window Screens -
Window Wraps -
Screened Porches -
Siding/Stucco -
Fascia(Underneath) -
Gutters(Underneath) -
Downspouts -
Stained Fences/Porches -
Grills/Grill Covers -
A/C Units (Spatter/Dents) -
Satellites(Spatter) -
Electrical Boxes(Spatter)
Here are some pictures of collateral that we have found on some walk-arounds…
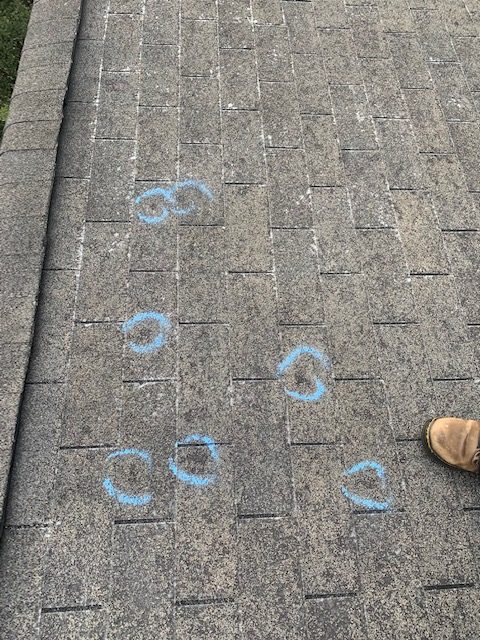
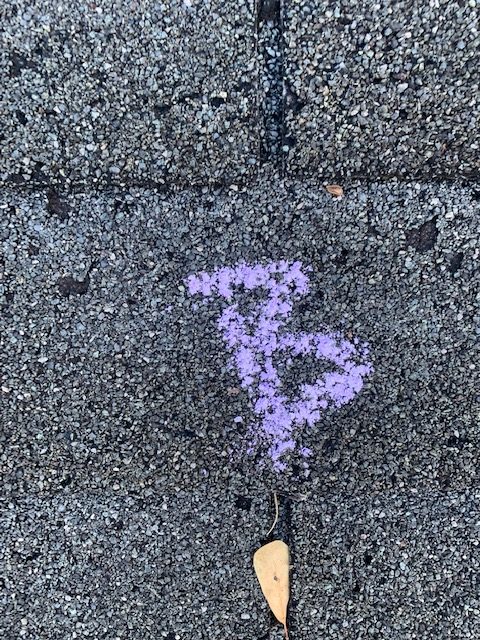
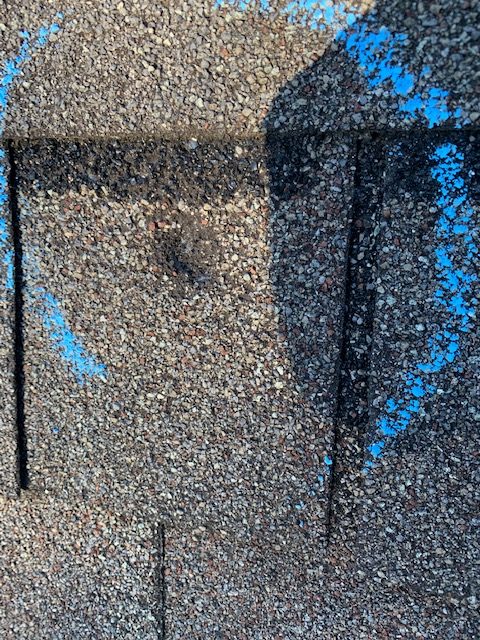
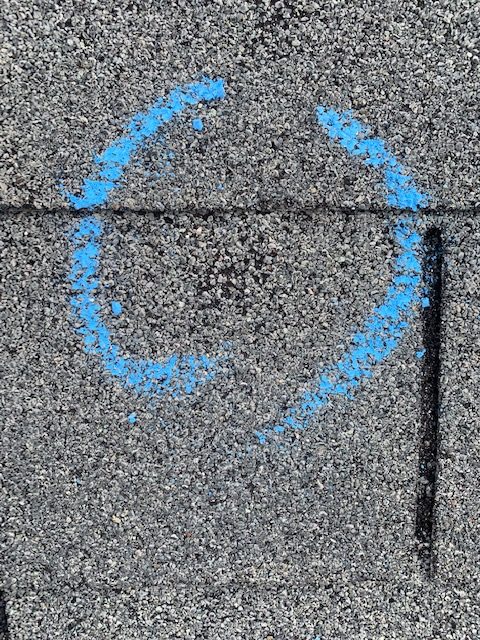
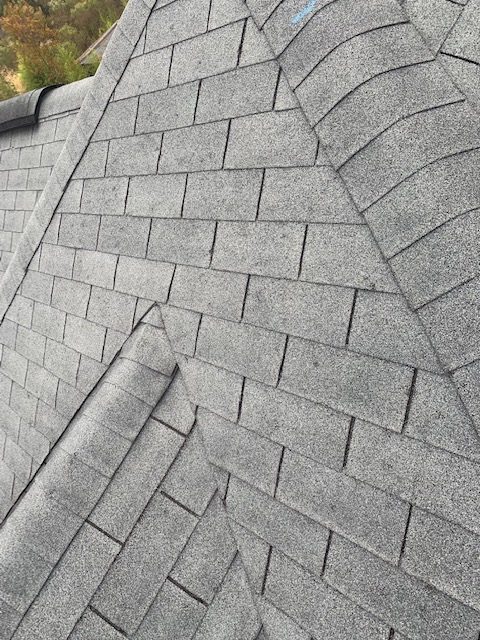
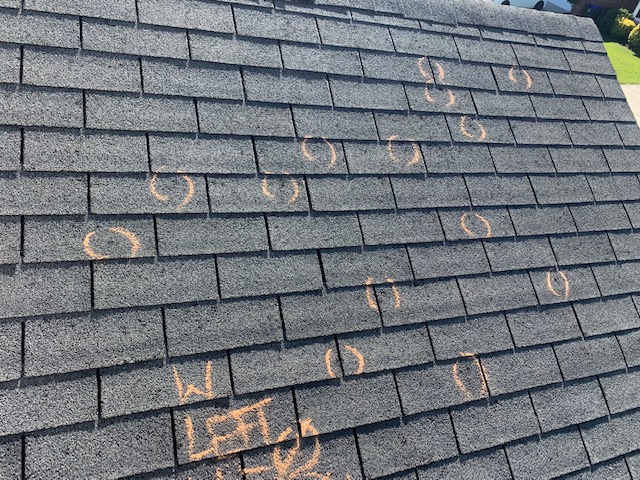
When are you sure that a roof that you’re inspecting has hail damage?
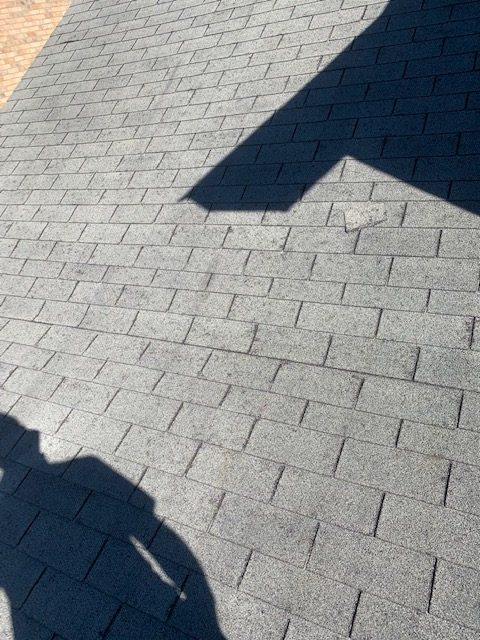
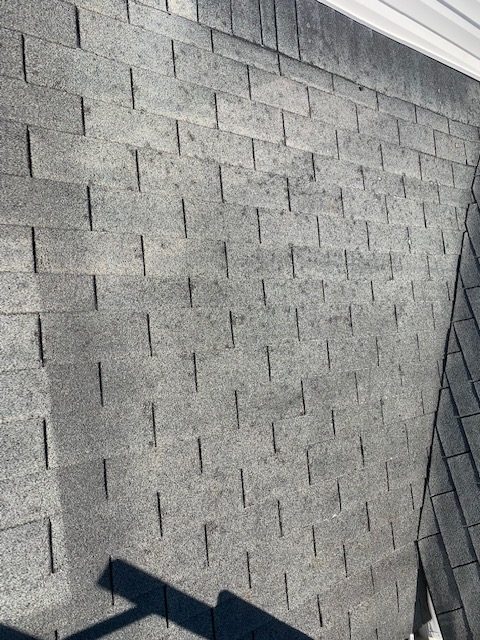
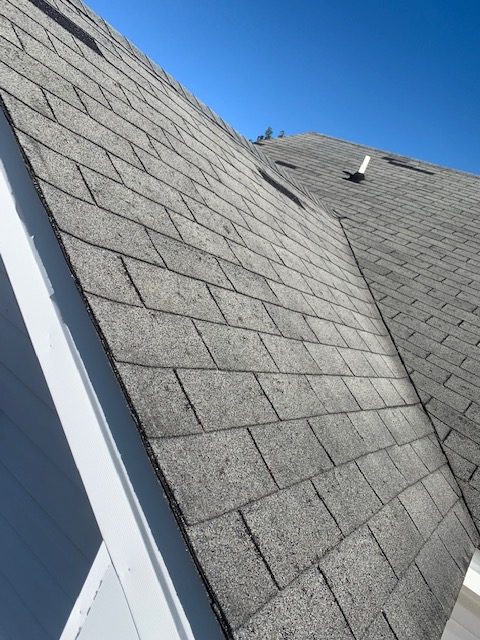
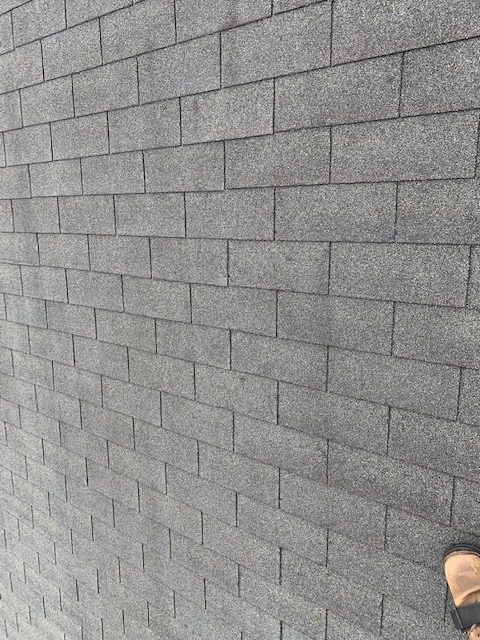
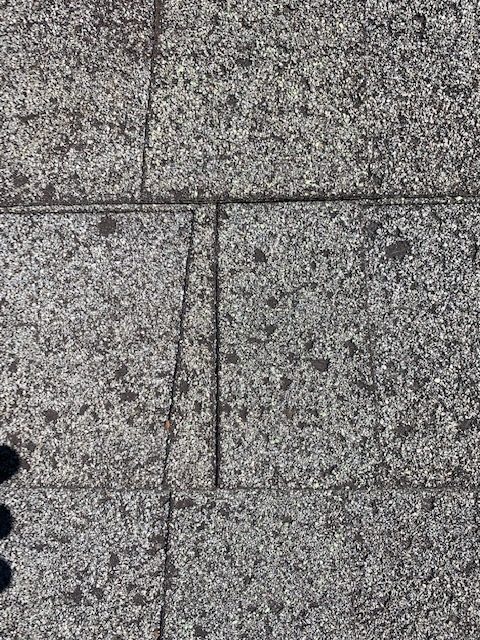
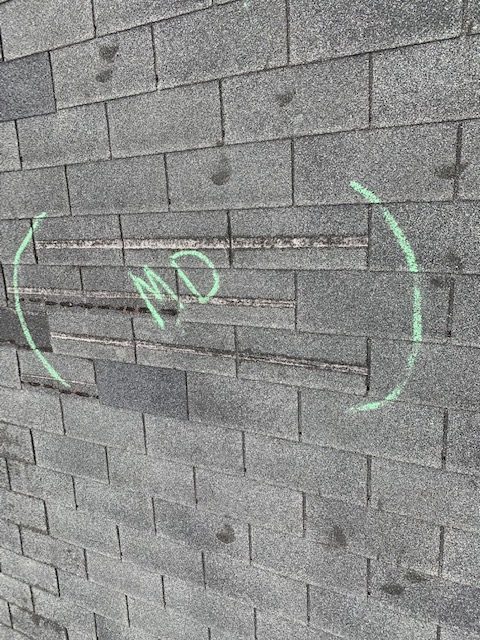
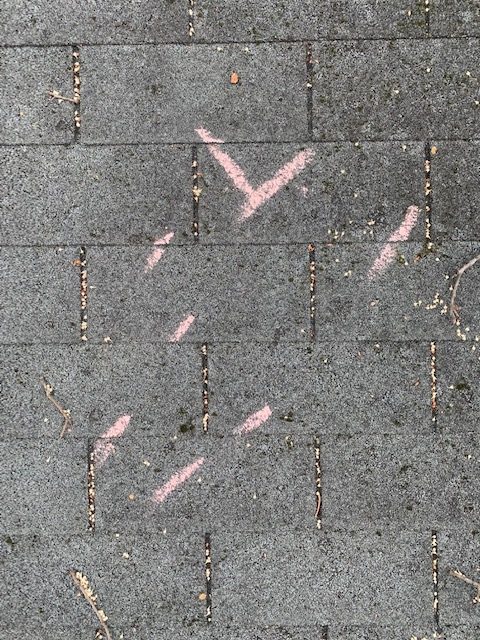
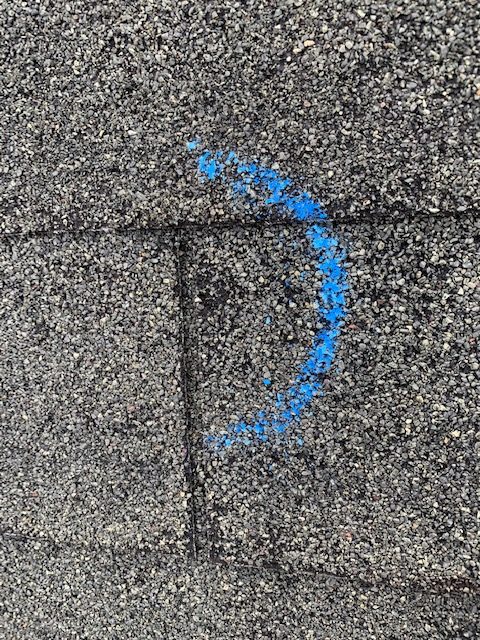
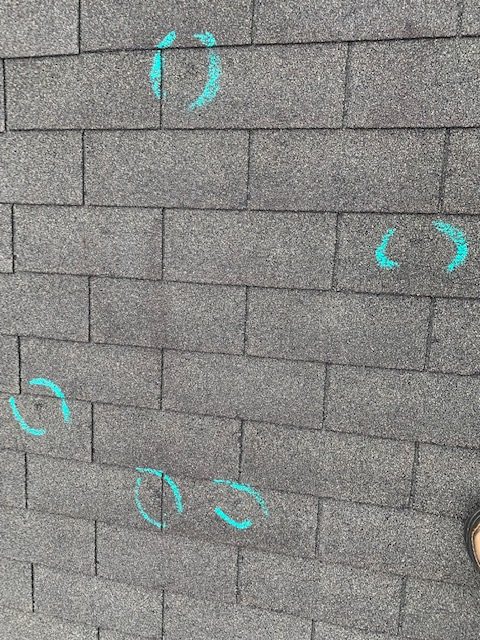
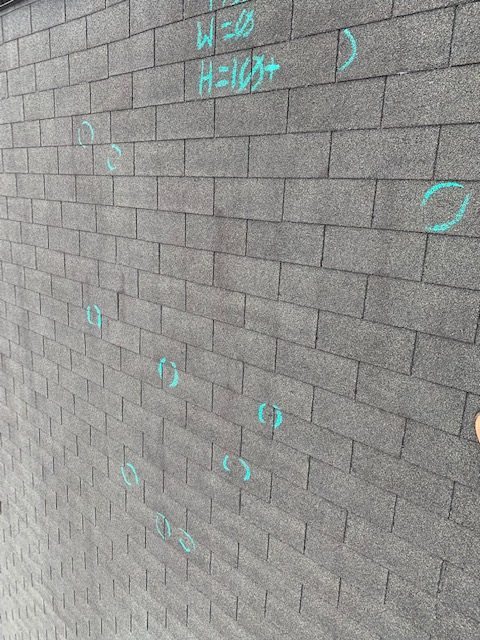
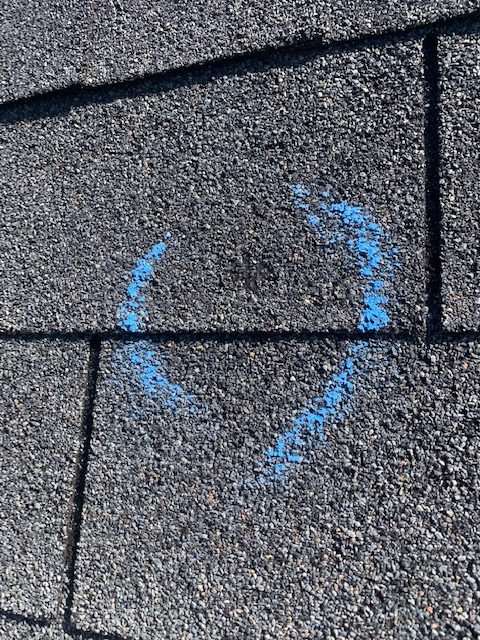
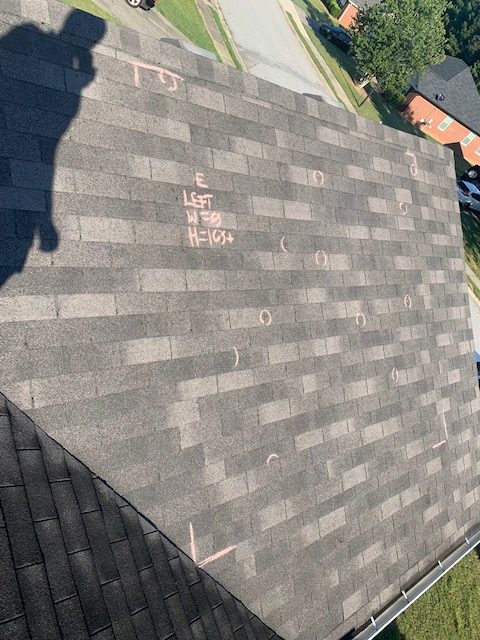
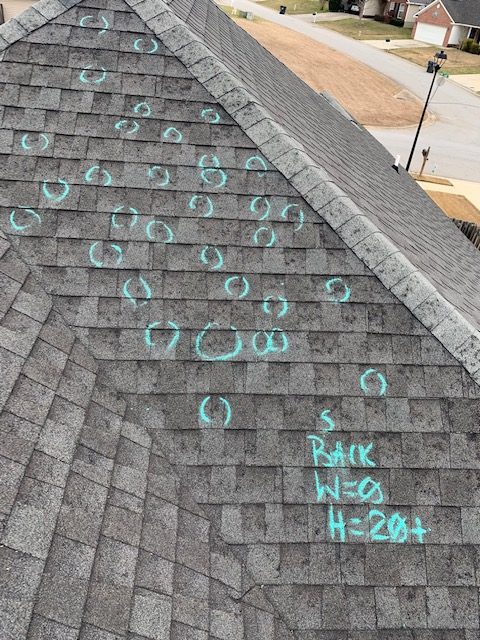
When you walk to the ridge of the roof after leaving your ladder, you should be looking across each slope for sporadic areas of granule loss. It is important to not look at the roof to closely or to get ‘tunnel vision’ on one area. If you do notice some sporadic granule loss, you then want to make sure that there is not a pattern to what you are seeing. For example, all of the granule loss being located in the same area of the shingle (maybe due to nail pops or manufacturer defects). upon further analysis, you then find the best location to place your 10’x10′ square on each slope. You want to place your square away from the areas of heaviest traffic on the roof and free from any obstructions that may have shielded the area, like tree cover or an elevated slope above the one you are inspecting.
-What you are looking for as you start to walk the roof
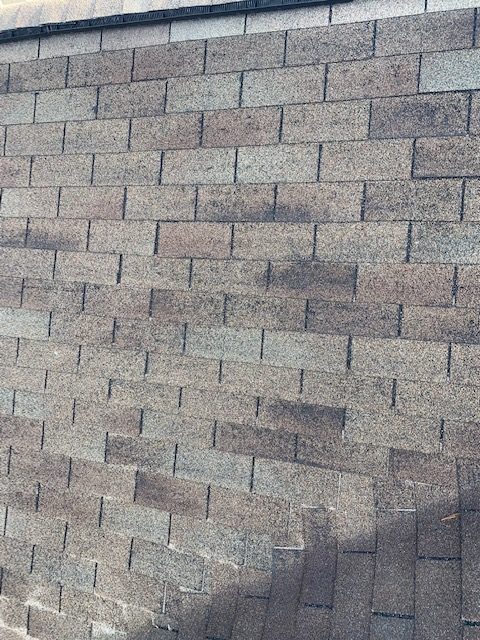
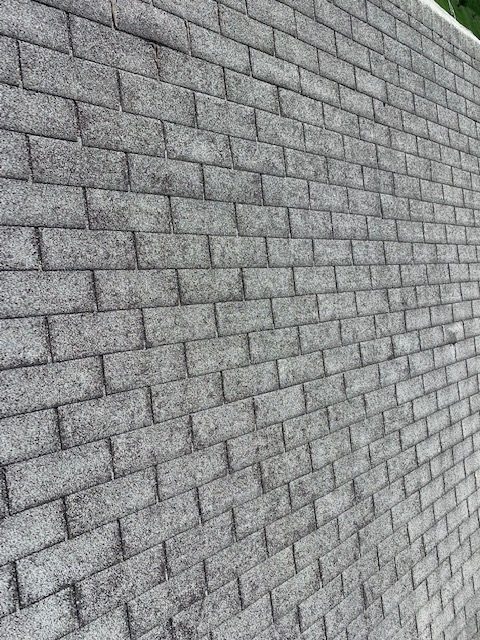
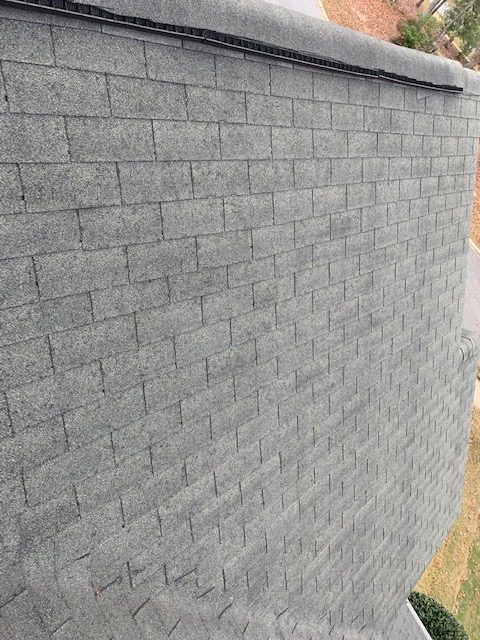
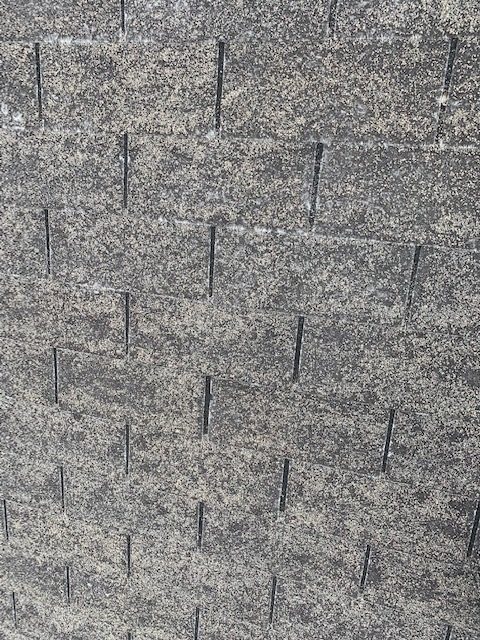
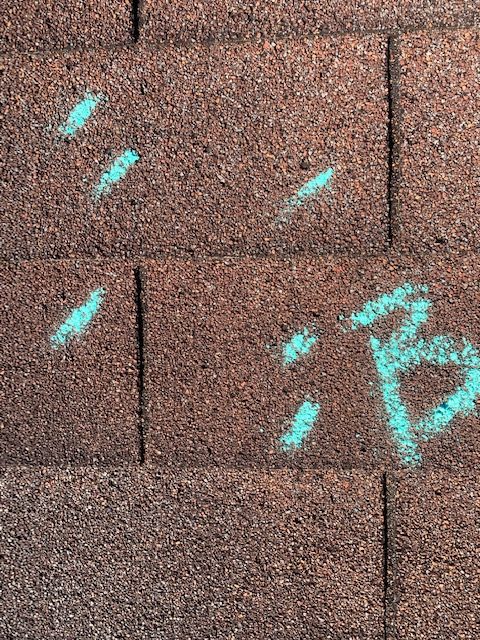
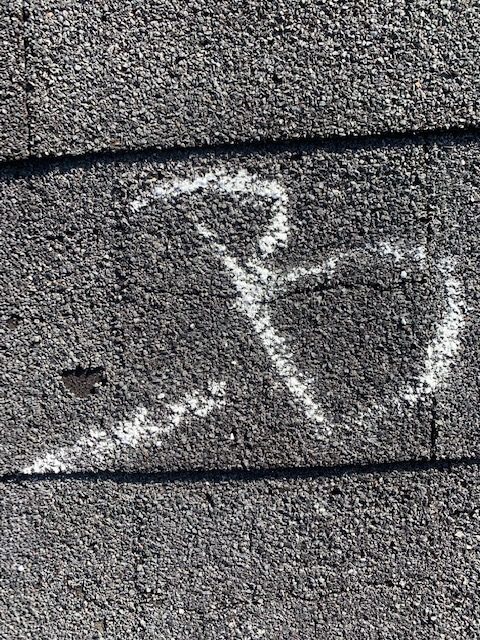
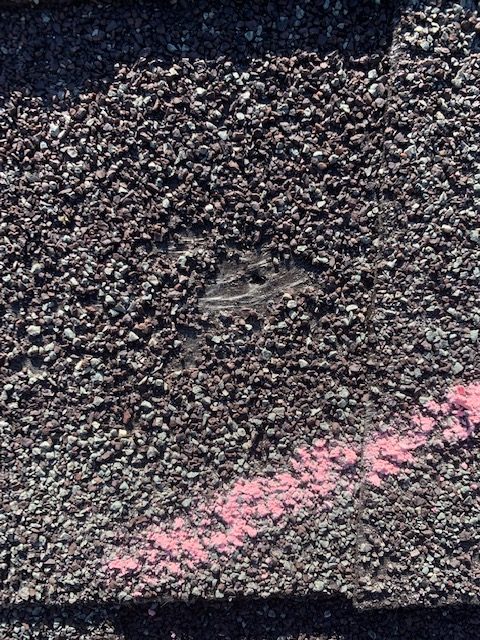
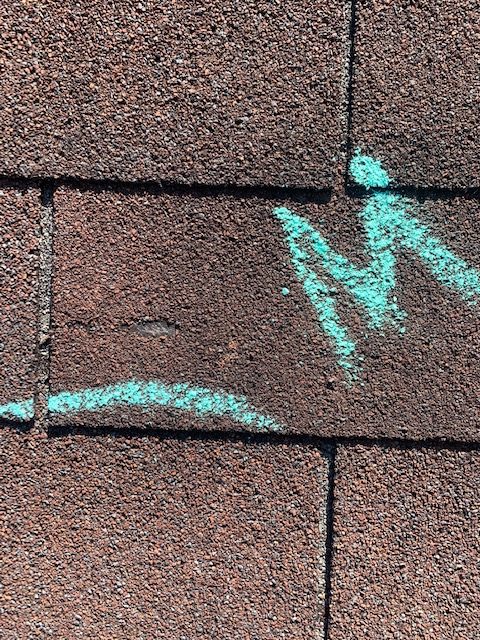
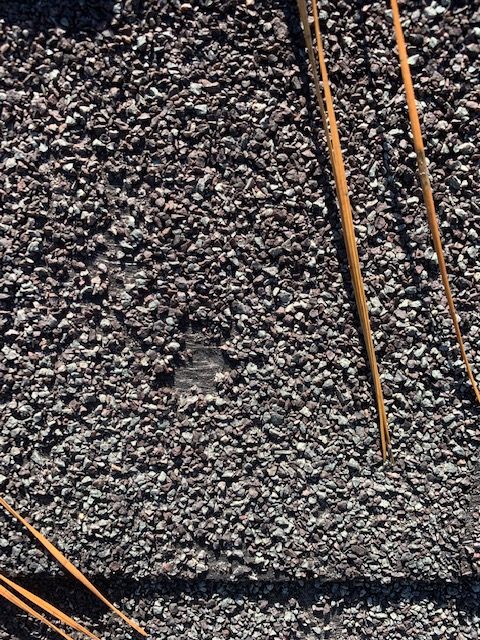
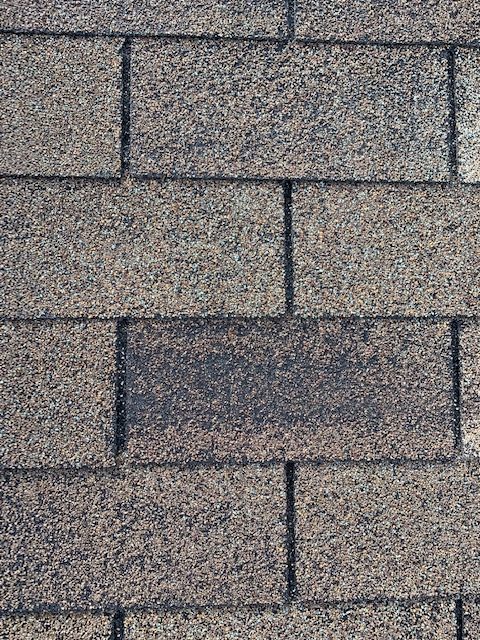
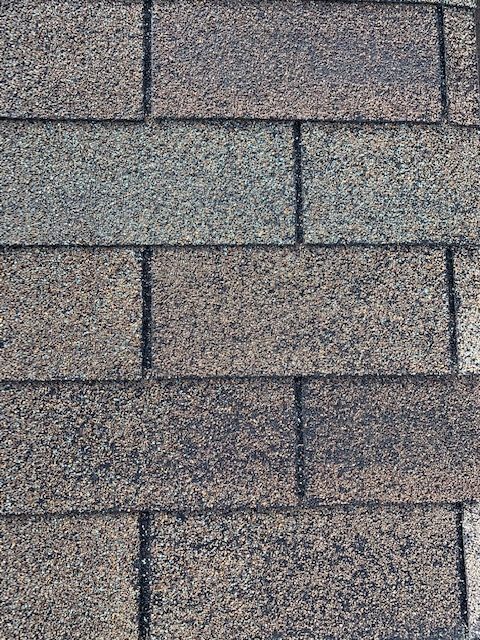
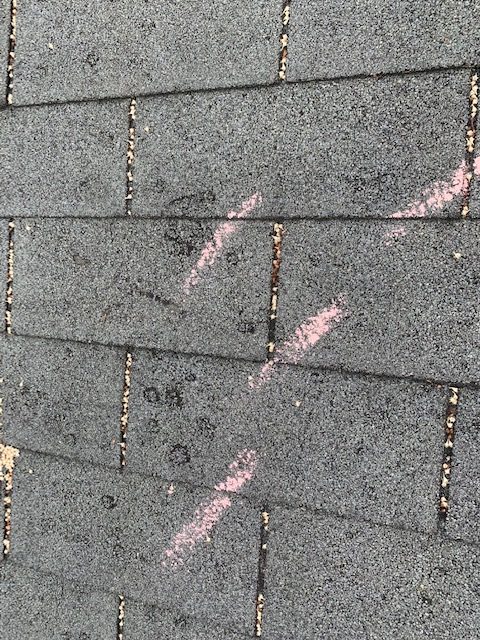
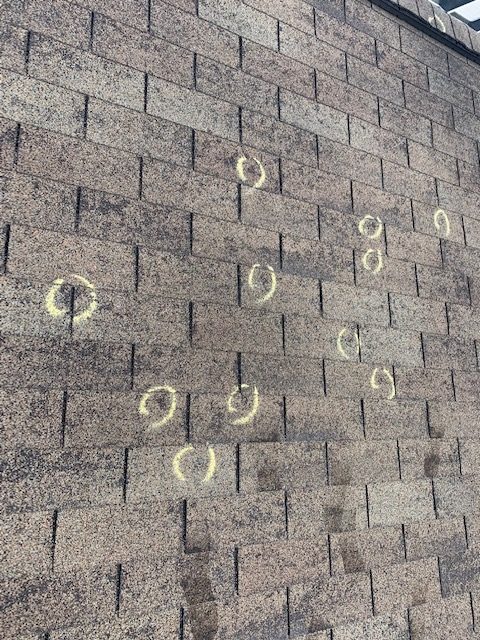
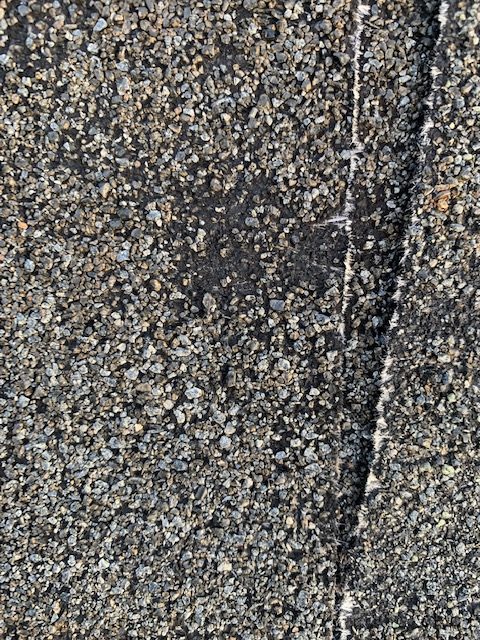
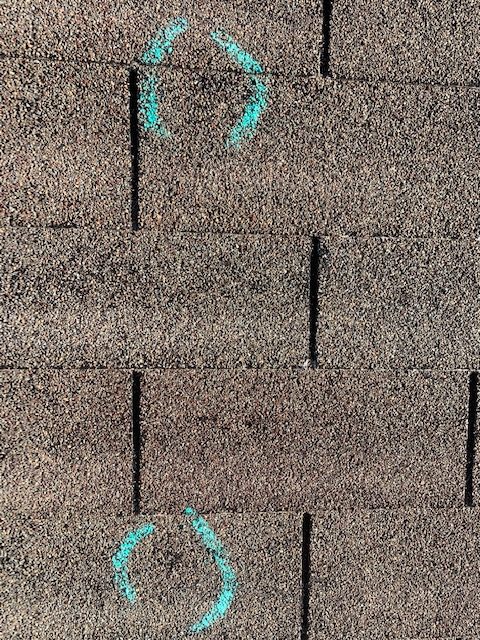
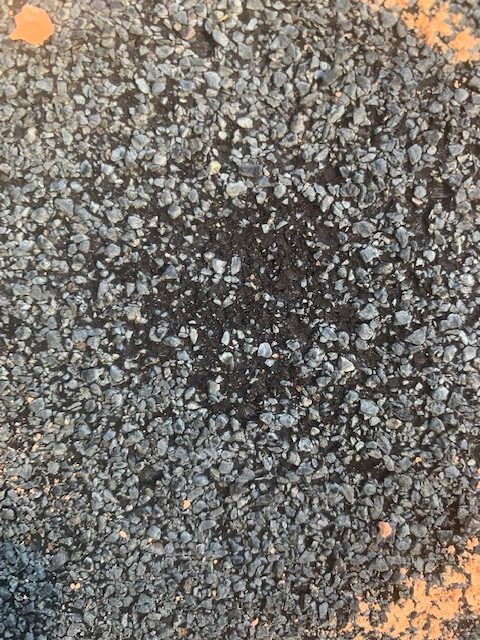
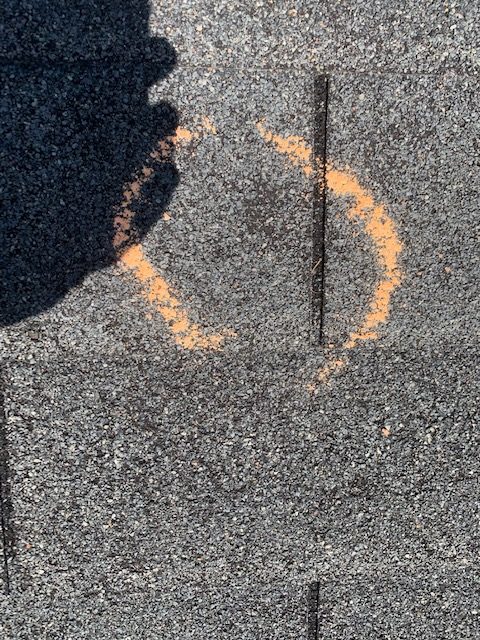
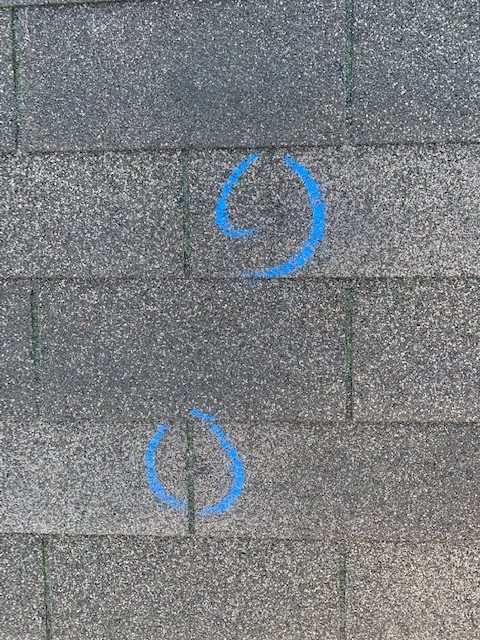
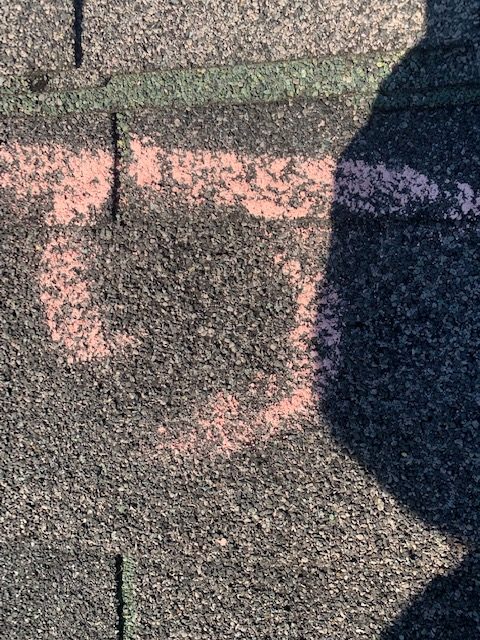
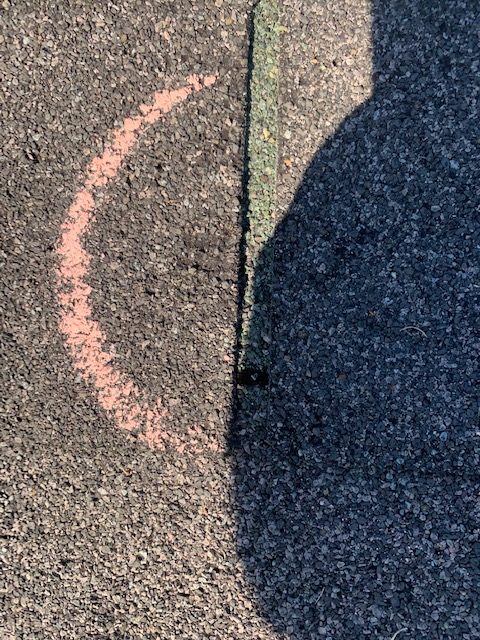
-Granule loss caused by hail on an old shingle
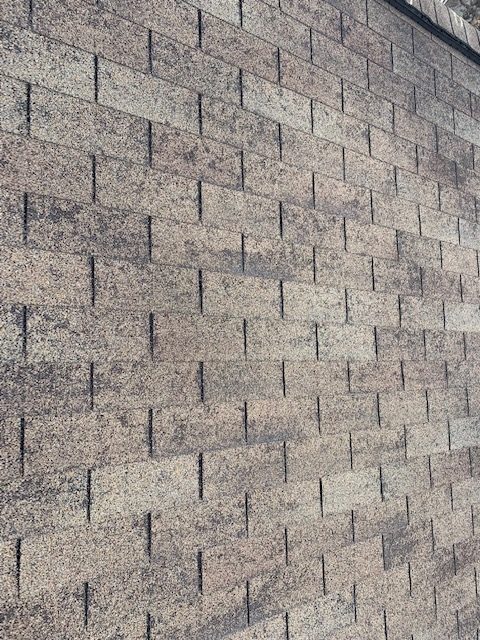
Is it more difficult to see damage on an older shingle?
There is a bit of a myth floating around out there. People tend to think that if you are inspecting an old roof with a lot of granule loss, that it is harder to see the damage. This belief is based on the notion that you can’t tell what is damage and what is naturally occurring granule loss. The fact of the matter is that it is just as easy to see damage on an older shingle. When hail impacts an older shingle, it displaces the granules. This exposes a part of the shingle mat that was not previously exposed to the elements, making the impacted areas darker than the rest of the shingle.
Pictured below is a mailer from the shingle manufacturer Owens Corning. Owens Corning states in this document, ‘missing granules do compromise’ the roofing material. As an inspector, we have to be vigilant and honest about our assessment of a roof. The question we have to ask ourselves is “Is the granule loss widespread enough to consider the material compromised or has the lifespan been negatively effected?”

Now that we have an understanding that we are looking at the roof as a whole and that we should not focus too closely on one certain area of the slope to determine if there is hail damage; there are a lot of conditions present on roofs that may be adding to the confusion that some may have. Below we have examples of these conditions.
-Examples of blisters or blistering
Blistering occurs when moisture or gases are trapped between the different layers of the shingle during the manufacturing process. When exposed to heat, the moisture or gases rise and eventually pop the granules above them off of the shingle. This leaves a bare mat contrary to the embedded granules when looking at hail damage.
-Examples of manufacturing defects
The defects below occur when the asphalt used in manufacturing does not bond with the shingle mat. This leaves the fiberglass exposed with little to no granules attached. This defect does resemble old hail damage. The difference is that with old hail damage, the exposed fiberglass will be fractured. Other defects include straight lines across the shingles. This is caused by rollers on conveyor belts as they manufacture the shingles.
A common manufacturing defect is extreme granule loss. This is a result of the granules not adhering to the asphalt solvents used in the manufacturing process. With this defect, you can literally wipe the granules off of the surface of the shingle with little effort.
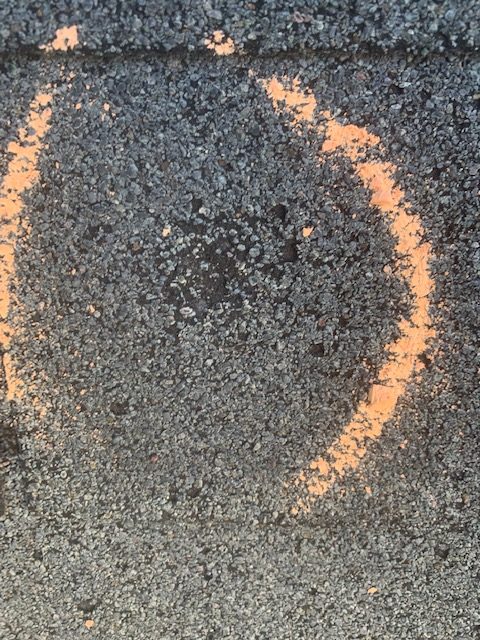
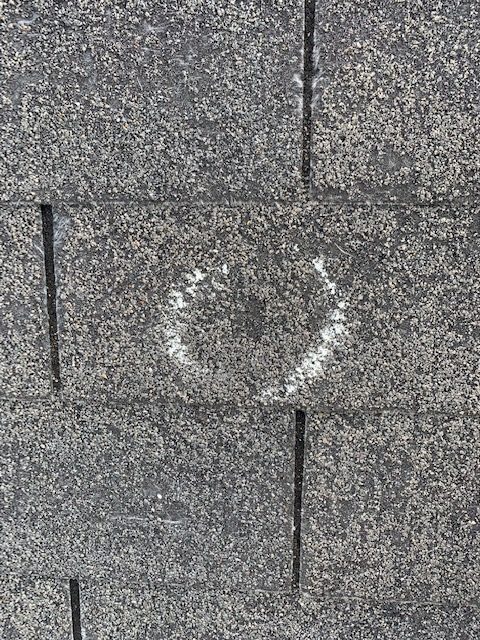
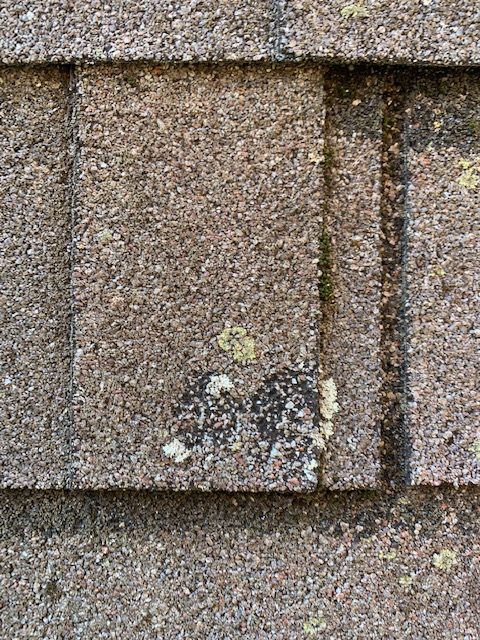
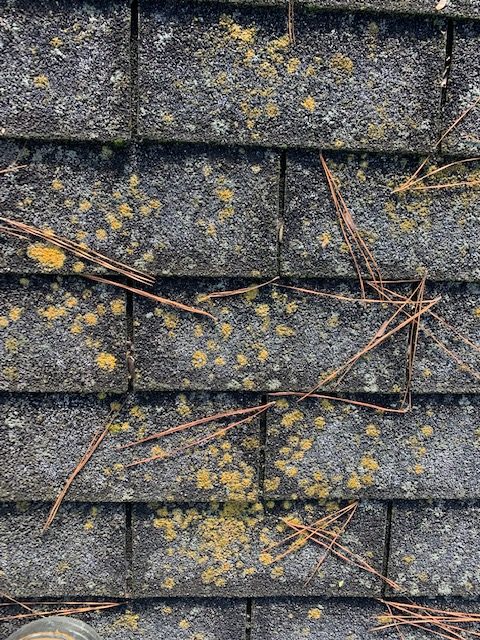
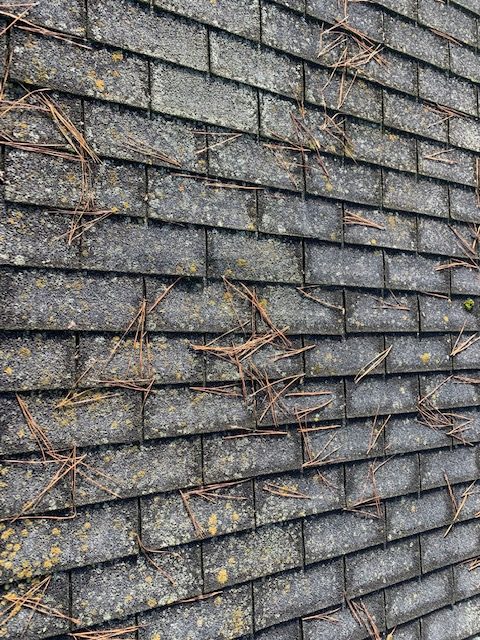
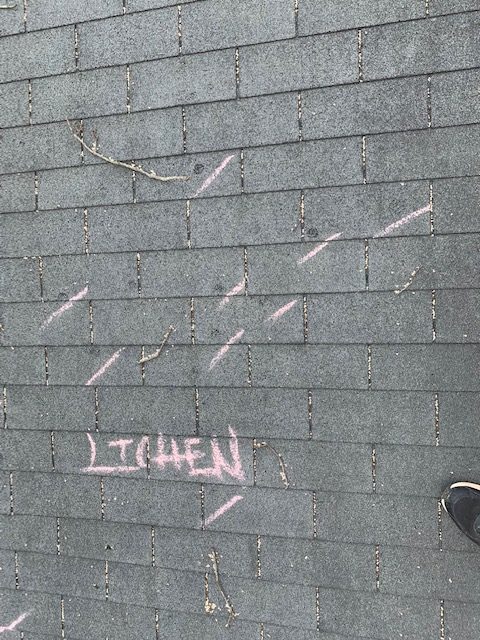
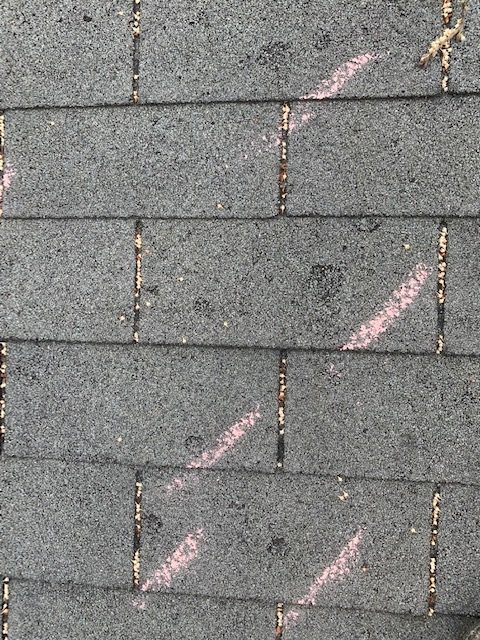
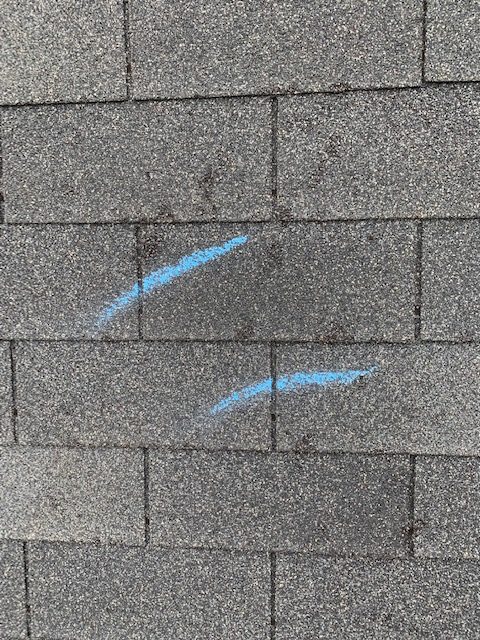
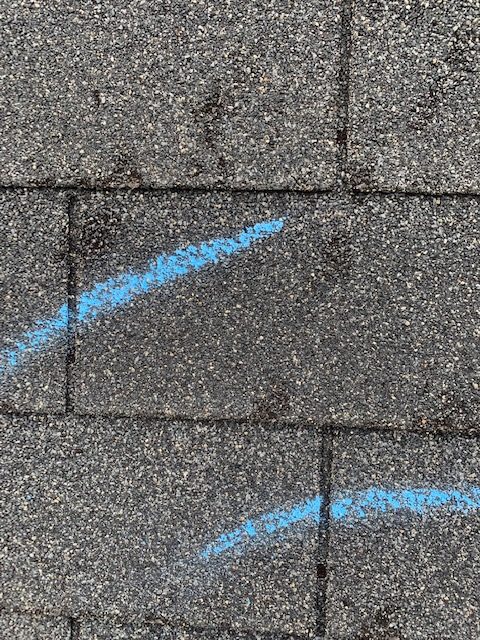
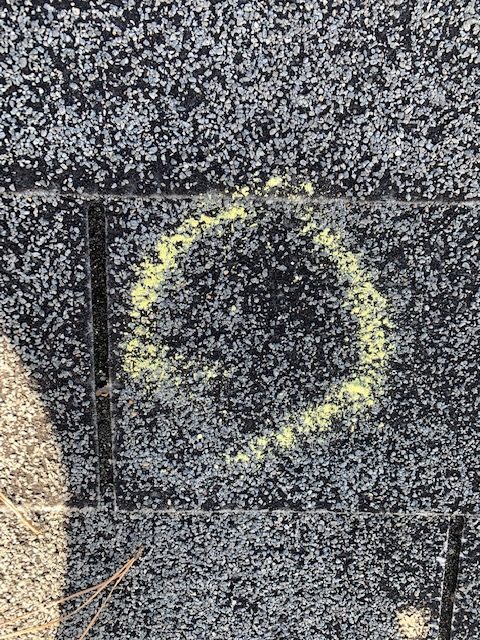
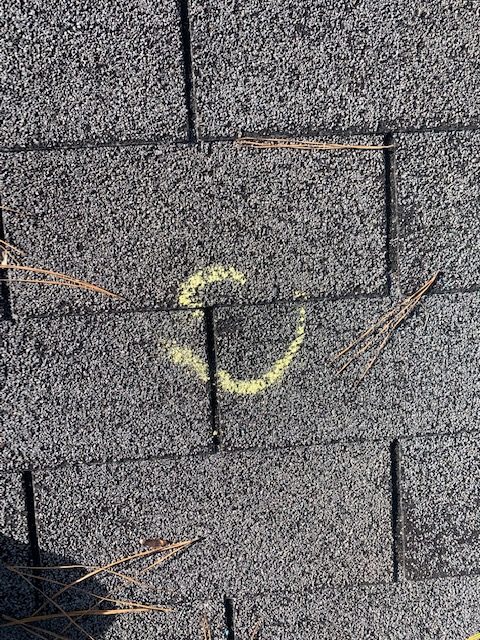
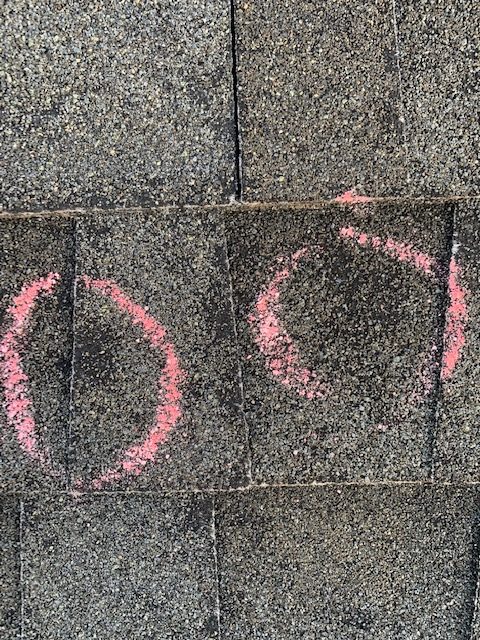
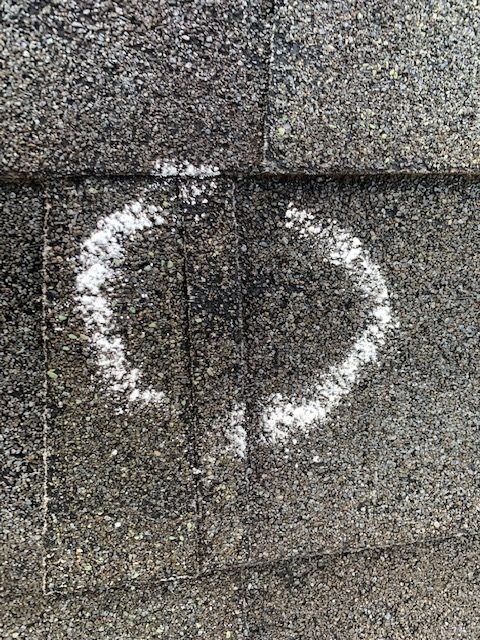
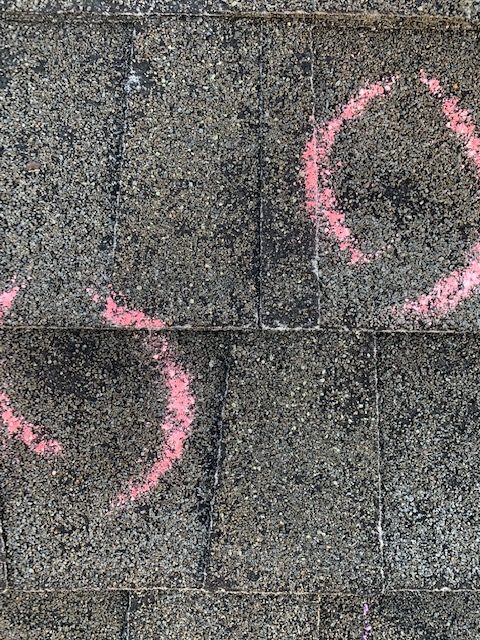
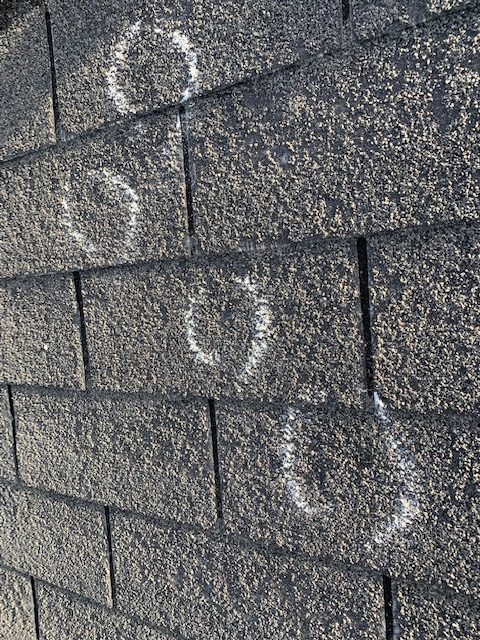
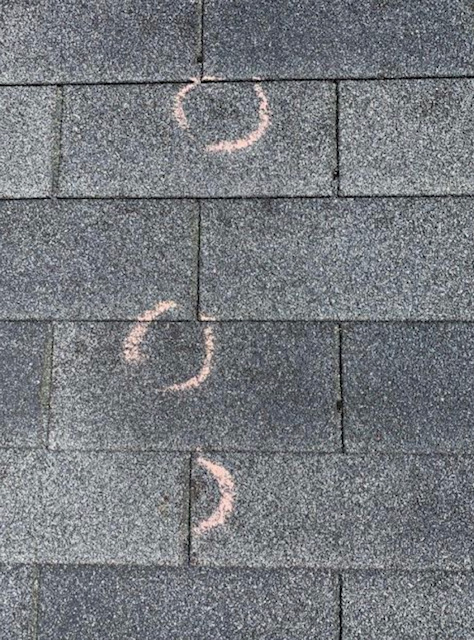
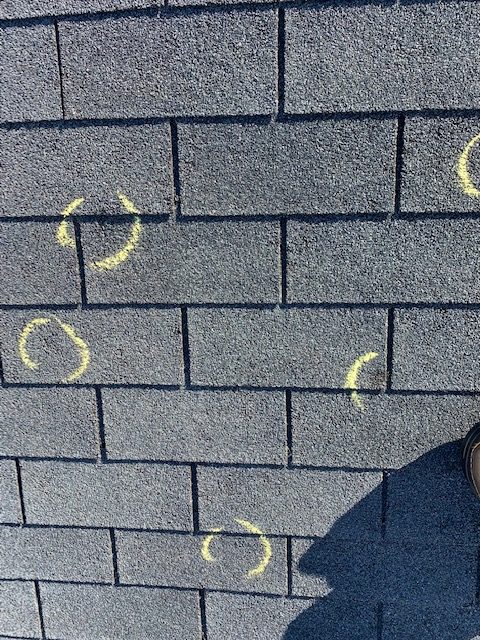
-Lichen
Lichen may resemble hail damage the most out of any of these anomalies. Due to it’s random or sporadic appearance and it is usually circular. Lichen is an organism that grows on and in to the shingle. This usually happens on the northern facing slopes or in areas that have tree cover. When it dies, it leaves a circular area of granule loss with some granules still intact. Bruising will not be present. You may feel somewhat of a soft spot. This is only due to the loss of granules and or shingle mat caused by the growth of the lichen.
-Examples of foot fall or foot traffic
This is a result of someone walking on the shingle after installation. Especially when it is hot. In some cases, you can see the granules pile up at the bottom of the foot traffic but remain stuck to the shingle. A sure sign that this was caused by someone walking on a hot shingle.
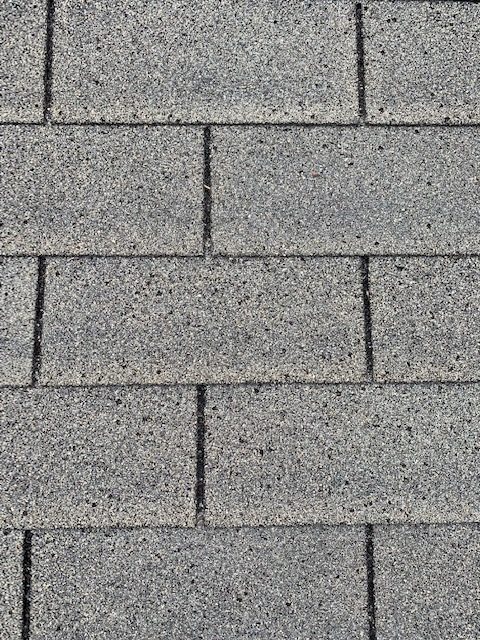
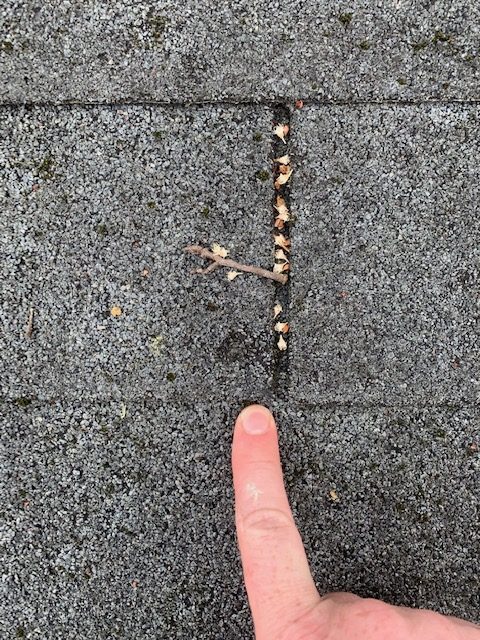
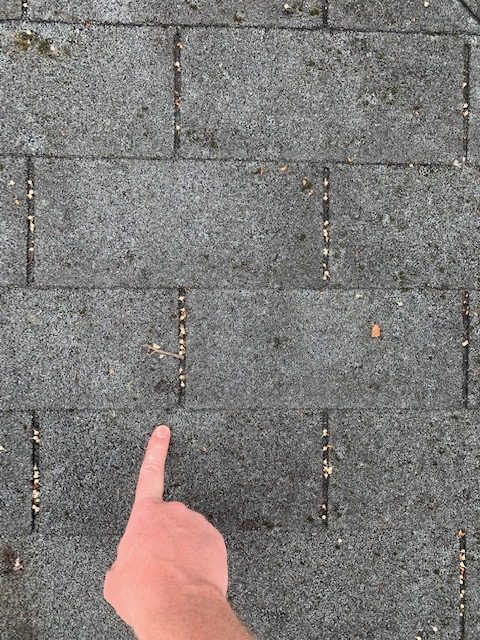
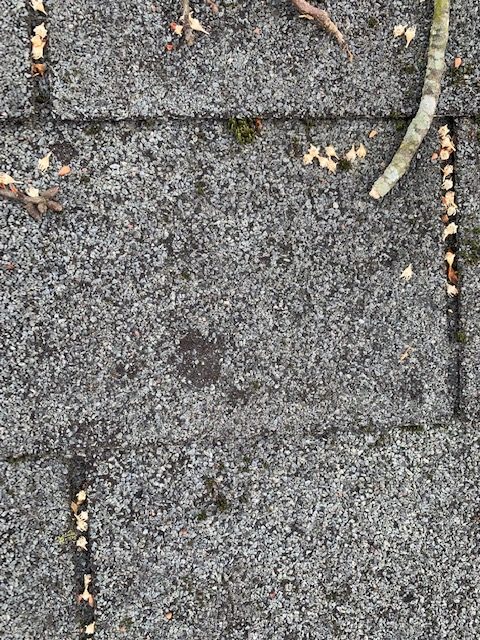
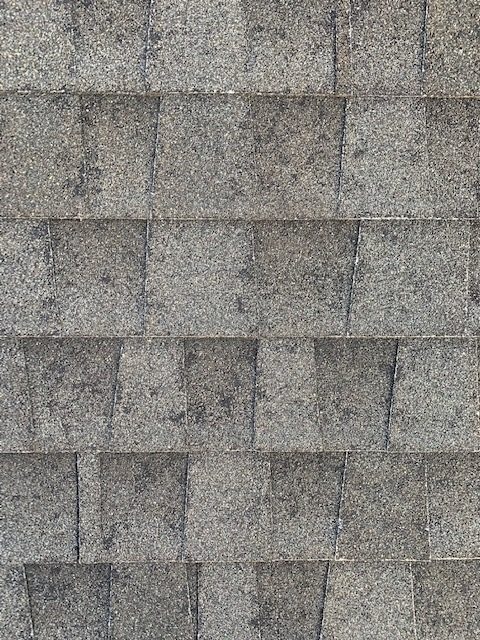
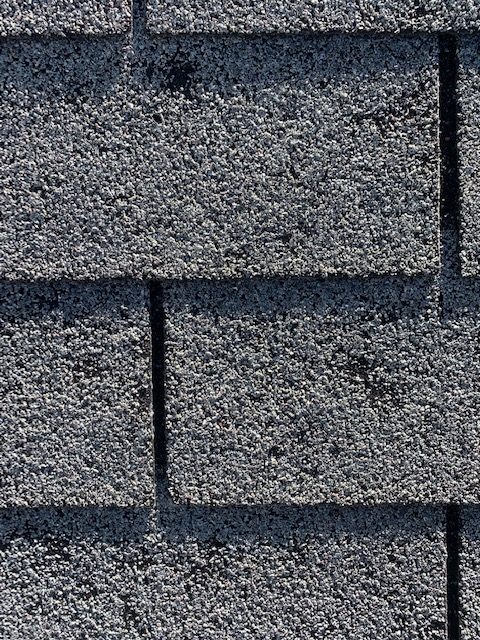
-Naturally occurring granule loss
Naturally occurring granule loss can confuse someone with an untrained eye. When looking across these slope, you will see some patches of concentrated granule loss. They will not look as if it was created by an impact (No granules driven in, no bruising or obvious indentation). It is just a patch of missing granules. To be clear, you can still have hail damage on a slope with naturally occurring granule loss but it should stick out to you if you are assessing the slope as a whole and are not focused on each patch of granule loss.
Congratulations!!! If you’ve managed to grudge yourself through all of this content and combed through the details, then it should be clear by now that we have three rules when assessing a roof for hail damage.
-
#1 We evaluate the slope as a whole. Don’t focus on one spot or anomaly. -
#2 Do we have bruised or fractured mats? -
#3 Do we see widespread granule loss? Enough to say that the lifespan of the shingle has been negatively effected?
As previously mentioned, the best way to get a comfortable idea of what hail damage is, is to see it over and over again. As promised we have a lot of pictures of hail damage in all sizes. All hail damage will not look the same. Hopefully you were educated enough through the last segment to know what hail damage does not look like. Thank you for taking the time to learn and I trust that if this reaches enough people, we can all meet on a much more common ground across the industry. Regardless of your current position.
If you have any questions about this content or have additional pictures to share. Please feel free to send all communications to educautedinspector@outlook.com